Introduction: The “Colorful Milk Swirls” experiment is a fascinating and visually stunning activity that introduces children to the concept of surface tension and the properties of milk and dish soap. By adding a few drops of food coloring to milk and then applying dish soap, children can witness captivating swirls and patterns forming right before their eyes. This simple experiment is not only engaging but also a great way to spark curiosity about the wonders of science. Let’s dive in and create some magical milk art together!
Materials Needed:
- A shallow dish or plate (white or light-colored works best)
- Whole milk (enough to cover the bottom of the dish)
- Food coloring (a few different colors)
- Dish soap
- Cotton swabs or toothpicks
Step-by-Step Instructions:
Step 1: Set Up the Experiment Begin by selecting a shallow dish or plate. White or light-colored dishes work best for this experiment as they provide a vibrant contrast to the colors. Place the dish on a flat surface where the experiment can be easily observed.
Step 2: Add Milk to the Dish Pour enough whole milk into the dish to cover the bottom. The milk should form a thin layer, but not too deep, as you want to observe the effects of surface tension more effectively.
Step 3: Add Food Coloring Instruct your child to place a few drops of food coloring onto the surface of the milk. Use different colors and create a pattern if desired. It’s best to drop the colors in different areas of the milk’s surface to achieve a more dynamic effect.
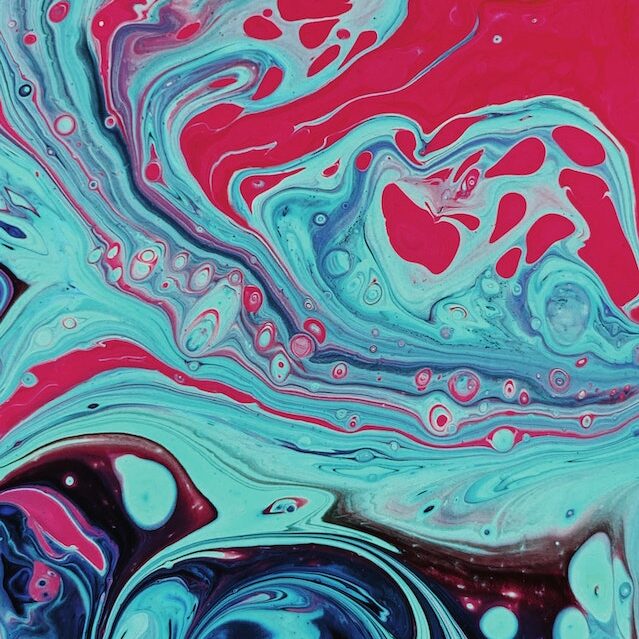
Step 4: Observe the Magic Now, it’s time to see the magic happen! Dip a cotton swab or toothpick into the dish soap. Carefully touch the soapy tip to the center of the food coloring drops on the milk’s surface. Watch in awe as the colors immediately start swirling and dancing, creating beautiful patterns and designs.
Step 5: Experiment with Different Techniques Encourage your child to explore and experiment with different techniques. They can add more soap, touch multiple points on the surface, or create a variety of designs by using the cotton swab or toothpick differently. Each attempt will yield unique results, providing a fun and interactive learning experience.
Conclusion: The Colorful Milk Swirls experiment is a captivating introduction to the concept of surface tension and the properties of milk and dish soap. Through this creative activity, children can witness the colorful magic of science and engage with the fascinating interaction between different substances. Take the opportunity to discuss the science behind the swirling patterns and the importance of surface tension in everyday life. Remember to foster curiosity and exploration, as these qualities will pave the way for a lifelong love of learning. Have a blast creating your own milk art, and let the colors and science come to life in your kitchen laboratory! Happy swirling!